The 2,000-word guide to YouTube's most important asset. Learn the exact 'Cutout + Stroke + Glo' workflow used by MrBeast and top Indian creators to double your Click-Through Rate.
You spent 2 days writing a script. You spent 8 hours filming. You spent 12 hours editing a 4K masterpiece. You upload it... and it gets 40 views.
Why? Because nobody clicked on it.
In the brutal arena of the YouTube Homepage, you are fighting for attention against MrBeast, T-Series, and Netflix. You have approximately 0.4 seconds to grab a viewer's eye as they doom-scroll. If your thumbnail is boring, your video doesn't exist.
The secret to winning this battle is High-Contrast Human Emotion. Look at any top YouTuber—MrBeast, CarryMinati, MKBHD, Ali Abdaal. They all use the same formula: Foreground Face Cutout + Background Context.
This "Masterclass Guide" will teach you exactly how to replicate this multi-million dollar style without spending a single Rupee on Photoshop.
Part 1: The Psychology of the "Cutout"
Why do we need to remove the background? Why not just use the photo?
1. Visual Hierarchy
A raw photo is "noisy". It has a chair, a door, a messy bed, a fan. The viewer's brain has to work to find the subject. By cutting yourself out and placing yourself on a clean background, you tell the brain: "LOOK HERE FIRST."
2. The "Pop" Effect
YouTube thumbnails are often viewed on small mobile screens. To make a subject "Pop", you need depth. By separating the Foreground (You) from the Background, you can apply different effects to each:
- Foreground: Sharp, High Saturation, High Contrast.
- Background: Blurred, Darker, Desaturated.
This contrast creates a 3D effect that grabs visual attention instantly.
Part 2: The Studio Workflow (Shooting for Thumbnails)
Don't just take a screenshot from your video. That's a rookie mistake. Video frames often have motion blur. You need to do a dedicated "Thumbnail Shoot".
The "Emotion" Checklist:
- The Shock: Hands on cheeks, mouth open (The classic "Clickbait" face). High energy.
- The Confusion: One eyebrow raised, hand on chin. Good for "Tutorials" or "Mistakes" videos.
- The Anger/Frustration: Hands throwing up in the air. Good for "Rant" videos.
- The Comparison: Holding two objects (e.g., iPhone vs Android). Look at the object, not the camera.
Pro Tip: Turn on your ring light. Stand against a plain wall (contrast helps AI). Take 20 photos in 2 minutes.
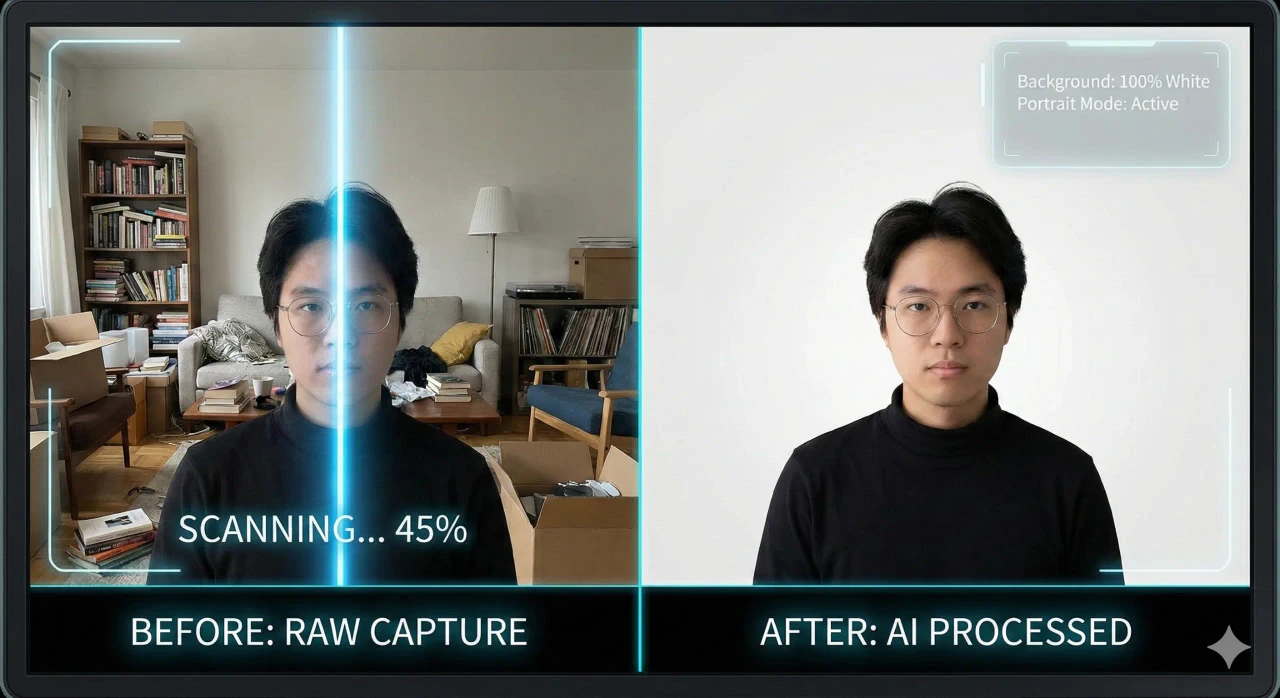
Part 3: The MojoDocs "Magical Cutout" Technique
Now, let's process these photos. Why use MojoDocs instead of Canva's built-in tool?
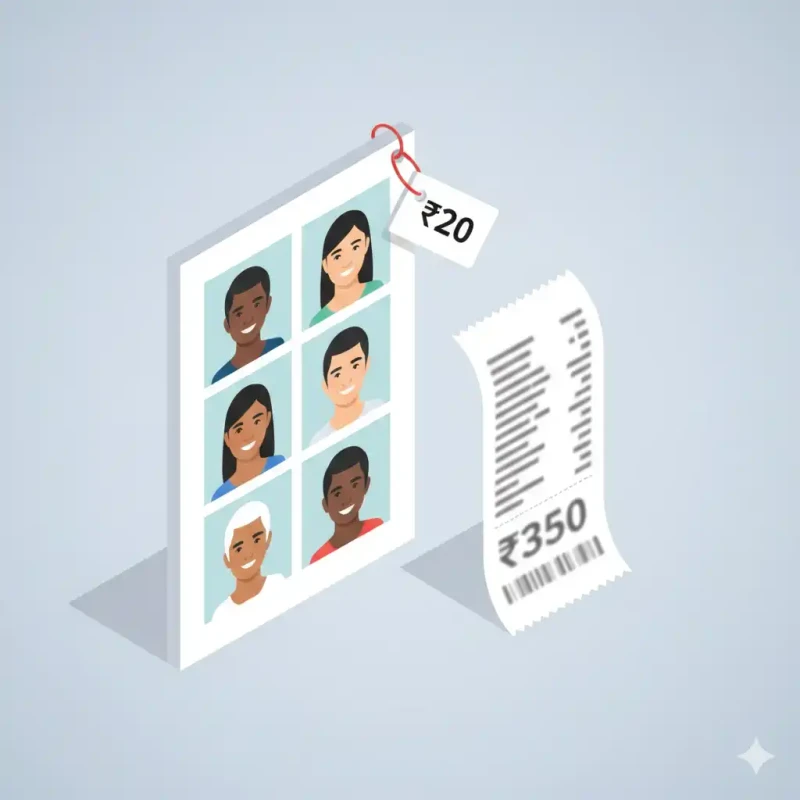
- It's Free: Canva charges ₹499/month for BG removal. MojoDocs is ₹0.
- Better Hair Detection: MojoDocs uses an alpha-matting model trained for hair strands. Canva often gives you "Helmet Hair" (smooth blocky edges). We keep the spikes realistic.
Step-by-Step:
- Open MojoDocs Background Remover.
- Upload your best "Shocked Face" photo.
- Wait 2-3 seconds for Local AI to process.
- Check Edges: Make sure your fingers/hands haven't been cut off.
- Download as Transparent PNG (High Res).
Part 4: The Construction (The MrBeast Formula)
You have your asset. Now let's build the thumbnail. You can use Canva (Free Version), Figma, or Photopea.
1. The Setup
Create a canvas: 1920 x 1080 pixels (Full HD). Don't use 720p; it looks blurry on Retina displays.
2. The Background
Import a background image relevant to your video (e.g., a gameplay screenshot or a blurred office).
Tip: Apply a "GaussianBlur" (Radius 5-10px) to the background. This ensures the text remains readable.
3. The "Sticker Effect" (The White Outline)
This is the most critical step. A floating head looks weird. A "Sticker" looks designed.
- In Canva: Import your MojoDocs PNG -> Edit Image -> Shadows -> Glow.
- Settings:
- Blur: 0 (Critical! We want a hard edge, not a soft glow).
- Transparency: 100%.
- Color: White (or Neon Yellow).
- Size: 10-15.
You now have that crisp, professional vector-like outline around your head.
4. Color Grading the Face
Your camera photo is likely too "Natural". YouTube needs "Hyper-Real".
- Increase Saturation by +15%.
- Increase Contrast by +10%.
- Increase Sharpness by +20%.
This makes the face stand out even on a tiny phone screen in broad daylight.
Part 5: Specific Styles for Indian Niches
Gaming (PubG / Valorant)
The Strategy: Gun + Reaction.
- Cut out your "Shocked" face.
- Cut out the "Gun" or "Skin" from the game (MojoDocs works on game screenshots too!).
- Make the Gun HUGE (larger than life).
- Put the game map in the background (Blurred).
Tech Review (Unboxing)
The Strategy: Eye Contact with Product.
- Cut out You + The Phone in your hand.
- Add a "Question Mark" or "Price Tag" graphic next to the phone.
- Use a clean dual-color gradient background (e.g., MKBHD Red/Black).
Vlogging (Travel)
The Strategy: "I was here".
- Do NOT remove the entire background. Instead, us MojoDocs to separate you, then put the same background back but apply a "Black & White" filter to it.
- This keeps you in color, background B&W. Very artsy and high CTR.
Conclusion: The 90/10 Rule
Successful creators spend 90% of their effort on the Video and 10% on the Thumbnail.
Viral creators spend 50% on the Video and 50% on the Thumbnail/Title.
You don't need a designer. You have MojoDocs. Start treating your thumbnail like a movie poster, not an afterthought. Your channel growth depends on it.