Discover how to play guitar online free, master virtual guitar chords lessons, and build fingerpicking muscle memory entirely offline in your browser using the local-first MojoDocs Web Guitar.
For decades, the acoustic guitar has stood as one of the most expressive and widely accessible instruments in the world. Its resonant wooden body, warm steel or nylon strings, and the tactile nature of sound production make it the ultimate tool for singer-songwriters, folk musicians, and classical performers alike. Yet, for many aspiring musicians, the initial steps of learning the instrument are blocked by physical, geographical, and financial barriers. Buying a high-quality physical acoustic guitar requires a significant upfront investment, and physical practice sessions can be hindered by early finger fatigue, wrist strain, and the struggle to establish basic coordinate motor skills.
Fortunately, modern web technology offers an alternative pathway: the virtual guitar chords lesson. By practicing on a virtual instrument, students can master acoustic guitar chords online and learn fingerpicking patterns using a standard computer keyboard. This browser-based approach serves as an effective learning bridge, helping students build essential cognitive muscle memory, understand fretboard layouts, and develop finger-thumb independence before ever picking up a physical instrument. In this comprehensive, technical guide, we will explore the science behind virtual acoustic synthesis, detail the configuration of a QWERTY keyboard for virtual guitar practice, lay out a series of progressive fingerpicking drills, and examine the economics and security of digital music practice.
The Evolution of String Synthesis and Digital Guitar Practice
To understand the utility of learning guitar chords online, we must trace how string instrument simulation has evolved. Early digital instruments relied on simple playback engines. When a user clicked a button or played a note, the software loaded a pre-recorded audio sample of a guitar string and played it back. While this method produced realistic tones, it suffered from severe technical limitations. High-quality samples required large downloads, causing long page-load times. Furthermore, sample playback engines struggled to replicate the subtle details of guitar play, such as the slide between frets, the varying intensity of a finger pluck, or the sympathetic resonance of open strings when other notes are played.
Modern browser-based simulators bypass these limitations by using real-time physical modeling synthesis. Instead of playing back static audio files, the browser uses digital signal processing (DSP) to simulate the physical behavior of a vibrating string. This method is incredibly light on network resources and allows for responsive, interactive playing. For a student practicing online, this means that every key press produces an immediate, dynamically synthesized tone. This real-time feedback is crucial for building the precise rhythmic coordination required for complex techniques like fingerpicking.
The Economics of Guitar Education: Physical Instruments vs. Online Subscriptions
For music students in India, the cost of acquiring and learning a physical instrument can be a significant barrier. A high-quality, entry-level acoustic guitar, such as the Yamaha F310, Cort AD810, or Fender FA-115, typically costs between ₹9,000 and ₹13,000. In addition to the guitar, beginners need essential accessories: a protective gig bag (₹800 to ₹1,500), a digital tuner (₹500), replacement steel strings (₹600 to ₹900 per set), a capo (₹400), and a variety of guitar picks (₹150). While these items can be ordered for quick delivery using services like Blinkit, Zepto, or Swiggy Instamart, the initial startup cost can quickly exceed ₹12,000.
Once a student has an instrument, they must find instruction. Local music schools in major urban areas like Mumbai, Delhi, Bengaluru, Pune, and Kolkata charge between ₹1,500 and ₹3,500 per month for one weekly lesson. Over a year, this adds an additional ₹18,000 to ₹42,000. Alternatively, online learning applications like Yousician, Fender Play, or JustinGuitar charge subscription fees of ₹1,000 to ₹2,500 per month. These subscriptions often require credit cards and automatic monthly renewals, which can be difficult to manage under local banking regulations.
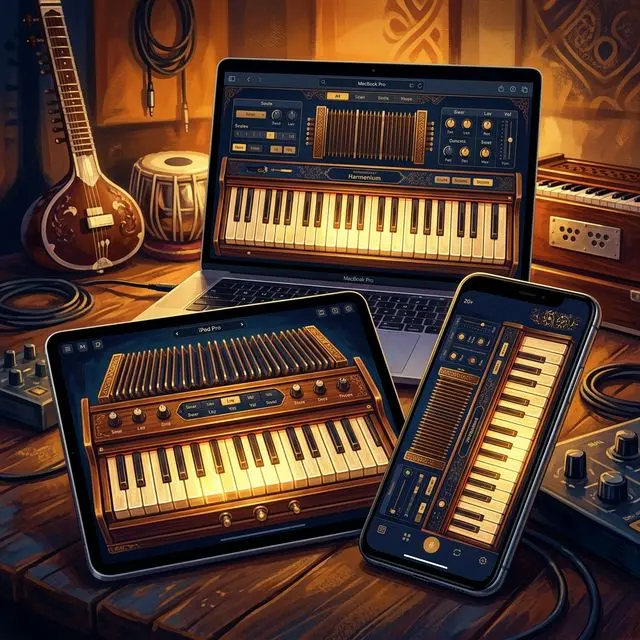
MojoDocs provides a free, client-side alternative. The web-guitar tool runs locally in your web browser, requiring no registration, subscription fees, or hardware investment. It allows students to practice chord layouts, learn scales, and study fingerpicking patterns using a standard computer keyboard at zero cost. This makes music theory and initial muscle-memory practice accessible to anyone with a computer and an internet connection.
| Method | Cost | Privacy |
|---|---|---|
| Physical Entry-Level Acoustic Guitar & Accessories | ₹10,500 - ₹15,000 upfront + ₹24,000/year for weekly classes | 100% Offline (Analog) but suffers from high physical barriers and wood warping |
| Paid Online Apps & Video Subscriptions | ₹12,000 - ₹30,000/year (Yousician, Fender Play) | Poor (Requires active internet, collects keystrokes, audio tracking, cookies) |
| MojoDocs Web Guitar (web-guitar) | ₹0 (Free, local-first engine) | 100% Secure (Zero-data upload, works entirely offline) |
By eliminating subscription costs and the need for immediate hardware purchases, web-based local-first applications lower the financial barrier to entry. Students can practice with a calibrated, zero-latency instrument without investing in hardware or software licenses.
Data Sovereignty and the Offline Flight Mode Audit
Data privacy is an important consideration when using digital learning tools. Many modern music applications upload user keystrokes, practice times, and microphone audio to remote servers. This telemetry is often used to train machine learning models or build commercial profiles. This poses a privacy risk for musicians, who may not want their practice sessions or vocal profiles recorded and stored in the cloud.
This risk is similar to the privacy concerns surrounding official identification documents. In India, documents like driving licenses on the Parivahan portal, Aadhaar details from UIDAI, PAN cards from NSDL, or passports from the Ministry of External Affairs (MEA) contain sensitive biometric and personal information. Users expect these documents to be handled securely without exposure to third-party trackers. The same standard of privacy should apply to creative workspaces.
The MojoDocs Web Guitar is built on a local-first architecture to address these privacy concerns. Using the browser's native Web Audio API, the sound synthesis is performed entirely on your device. When you press a key, the browser's audio engine generates the sound waves in real time without sending data back to a server. You can verify this local-first behavior by testing the application offline.
The Flight Mode Verification
1. Open MojoDocs. 2. Turn off WiFi/Internet. 3. Process the file. 4. It completes instantly without any data leaving your device.
This design ensures your practice sessions remain private. Because no audio data is transmitted, the application is also free from network latency, allowing for responsive playing even on slower devices.
The Technical Physics of Acoustic Guitar Synthesis
To simulate a realistic acoustic guitar sound in a web browser without using large sample files, developers use the Karplus-Strong string synthesis algorithm. First developed by Kevin Karplus and Alex Strong in 1983, this algorithm simulates the physical behavior of a plucked string using a short noise burst, a delay line, and a feedback loop.
When you pluck a physical guitar string, your finger or pick excites the string with a brief burst of energy. This energy travels down the string, reflects off the bridge and nut, and travels back, creating a standing wave. As the wave travels, it loses energy due to friction, air resistance, and the dampening of the wood. Higher-frequency harmonics decay much faster than lower-frequency ones, which gives the acoustic guitar its characteristic warm, fading tone.
The Karplus-Strong algorithm replicates this behavior using a digital signal processing (DSP) loop:
- Excitation: A short buffer of white noise is generated. The length of this buffer (L, in samples) corresponds to the fundamental period of the target note. L is calculated as L = Fs / f, where Fs is the audio system's sample rate (usually 44,100 Hz or 48,000 Hz) and f is the frequency of the note (such as 110.00 Hz for the A2 string).
- Feedback and Delay: The buffer of noise is loaded into a delay line. The output of the delay line is fed back into its input.
- Low-Pass Filtering: A simple low-pass filter is placed in the feedback loop. This is typically a two-point average filter, defined by the difference equation:
y[n] = g * (x[n] + x[n - 1]) / 2
Here, g represents a feedback gain coefficient slightly less than 1 (such as 0.996). Averaging adjacent samples attenuates high-frequency harmonics faster than low-frequency ones, simulating the natural dampening of a physical guitar string.
By routing the output of this algorithm through a BiquadFilterNode to shape the tone and a GainNode to control the volume, the browser can synthesize realistic string sounds on the fly. Because these calculations are handled by the browser's compiled C++ engine, the audio latency is kept under 5 milliseconds, providing a responsive playing experience.
Pro Tip: When using the Web Guitar on a laptop, close unnecessary browser tabs and applications. Real-time audio synthesis is sensitive to CPU interruptions. Reducing system load ensures that the Web Audio thread runs smoothly, preventing clicks, pops, and audio dropouts during practice.
Configuring Your QWERTY Keyboard for Virtual Guitar Practice
To practice guitar chords and fingerpicking on a computer, the physical keys of a QWERTY keyboard must be mapped to the strings and frets of a virtual guitar. The MojoDocs Web Guitar uses a layout that represents the six strings of a standard acoustic guitar in standard tuning (E2, A2, D3, G3, B3, E4).
The default mapping uses rows of keys to trigger individual strings and frets. The layout is configured as follows:
- String 6 (Low E - 82.41 Hz): Key
1(Open), Key2(1st Fret / F), Key3(2nd Fret / F#), Key4(3rd Fret / G), Key5(4th Fret / G#). - String 5 (A - 110.00 Hz): Key
Q(Open), KeyW(1st Fret / Bb), KeyE(2nd Fret / B), KeyR(3rd Fret / C), KeyT(4th Fret / C#). - String 4 (D - 146.83 Hz): Key
A(Open), KeyS(1st Fret / Eb), KeyD(2nd Fret / E), KeyF(3rd Fret / F), KeyG(4th Fret / F#). - String 3 (G - 196.00 Hz): Key
Z(Open), KeyX(1st Fret / Ab), KeyC(2nd Fret / A), KeyV(3rd Fret / Bb), KeyB(4th Fret / B). - String 2 (B - 246.94 Hz): Key
U(Open), KeyI(1st Fret / C), KeyO(2nd Fret / C#), KeyP(3rd Fret / D), Key[(4th Fret / D#). - String 1 (High E - 329.63 Hz): Key
H(Open), KeyJ(1st Fret / F), KeyK(2nd Fret / F#), KeyL(3rd Fret / G), Key;(4th Fret / G#).
This layout allows you to play individual notes or hold down chord shapes. For example, to play a C Major chord, you would press the keys corresponding to:
- String 5, 3rd Fret (C) ->
R - String 4, 2nd Fret (E) ->
D - String 3, Open (G) ->
Z - String 2, 1st Fret (C) ->
I - String 1, Open (E) ->
H
The Mechanics of Fingerpicking: Building Independence
Fingerpicking (also known as fingerstyle) is a technique where the player plucks the strings directly with their fingertips or fingernails, rather than using a pick. This style is characterized by its ability to play multiple parts simultaneously, such as a bassline, melody, and harmony.
In classical and folk fingerpicking, the fingers of the plucking hand are referred to using their Spanish names:
- P (Pulgar): The thumb, responsible for plucking the bass strings (Strings 6, 5, and 4).
- I (Indice): The index finger, responsible for plucking String 3.
- M (Medio): The middle finger, responsible for plucking String 2.
- A (Anular): The ring finger, responsible for plucking String 1.
When practicing on a computer keyboard, you can simulate this technique by using different fingers of your right hand to press the keys corresponding to the virtual strings. This helps train thumb-finger independence, which is one of the most challenging aspects of fingerstyle playing. The thumb (P) maintains a steady, rhythmic pulse on the bass keys, while the index (I), middle (M), and ring (A) fingers play melodic patterns on the treble keys.
Structured Fingerpicking Drills for Keyboard Practice
Drill 1: The Simple Arpeggio (4/4 Time)
This pattern moves sequentially through the strings, helping you build basic finger coordination and timing.
- Pattern Sequence: P - I - M - A - M - I
- Guitar Strings: 5 -> 3 -> 2 -> 1 -> 2 -> 3
- QWERTY Sequence (holding a C Major chord):
R->Z->I->H->I->Z - Practice Instructions: Play this sequence at a slow, steady tempo (around 60 BPM). Focus on keeping the volume of each note consistent and the transitions smooth.
Drill 2: The Travis Picking Pattern
Named after country guitarist Merle Travis, this pattern uses an alternating bassline played by the thumb, while the index and middle fingers play syncopated melodies on the higher strings.
- Pattern Sequence: P (bass 1) - I (treble) - P (bass 2) - M (treble)
- Guitar Strings: 5 -> 2 -> 4 -> 1
- QWERTY Sequence (holding a C Major chord):
R->I->D->H - Practice Instructions: The thumb must alternate steadily between the bass strings. Start slowly and focus on keeping the timing of the bass notes steady like a clock.
Drill 3: The 3/4 Waltz Pattern
This pattern is played in triple meter (3/4 time) and is common in folk, classical, and traditional music.
- Pattern Sequence: P - (I + M + A) - (I + M + A)
- Guitar Strings: 5 -> (3 + 2 + 1 simultaneously) -> (3 + 2 + 1 simultaneously)
- QWERTY Sequence (holding a C Major chord):
R-> (Z+I+H) -> (Z+I+H) - Practice Instructions: Pluck the bass note on the first beat, followed by the three treble strings played together on beats two and three. This creates the characteristic "boom-chic-chic" rhythm of a waltz.
Step-by-Step Lesson: Mastering Your First Fingerpicking Pattern Online
This lesson is designed to help you practice your first fingerpicking pattern using the virtual guitar. Follow these steps to set up your practice station and begin your routine.
Step 1: Set Up and Verification
Open the MojoDocs Web Guitar application in your browser. Perform the Flight Mode Audit by disconnecting your device from the internet. This ensures that the audio engine runs locally and your keystrokes are not sent to external servers. Connect your headphones directly to your device. Avoid using wireless Bluetooth headphones, as they can introduce audio delay, which interferes with your timing.
Step 2: Prepare Your Practice Materials
Print out chord sheets or diagrams to keep next to your computer. You can print these at a local Xerox shop or use a service like Blinkit print stores to have them delivered to your workspace. Having physical sheets keeps your screen clear for the application interface and helps you stay focused on the keyboard layout.
Step 3: Learn the Chord Shapes
Before starting the fingerpicking pattern, practice holding down the chord shapes. Start with two simple chords: C Major and A Minor.
- C Major: Press
R(String 5, 3rd Fret),D(String 4, 2nd Fret),Z(String 3, Open),I(String 2, 1st Fret), andH(String 1, Open). - A Minor: Press
Q(String 5, Open),D(String 4, 2nd Fret),C(String 3, 2nd Fret),I(String 2, 1st Fret), andH(String 1, Open).
Step 4: Practice Transitions
Practice switching between C Major and A Minor. Focus on lifting your fingers and placing them on the new keys simultaneously. Do this slowly, using a metronome to keep your timing consistent. The goal is to minimize the silence between chords during the transition.
Step 5: Apply the Fingerpicking Pattern
Once you can transition smoothly, introduce the fingerpicking pattern. Start with the Simple Arpeggio (P-I-M-A-M-I):
- Hold the C Major chord shape.
- Play the QWERTY sequence:
R->Z->I->H->I->Z. - Switch to the A Minor chord shape.
- Play the QWERTY sequence:
Q->C->I->H->I->C.
Step 6: Gradually Increase Tempo
Start at a slow, steady tempo (around 60 BPM). As your accuracy and muscle memory improve, gradually increase the speed. If you make a mistake, return to the slower tempo and repeat the drill until it is clean before speeding up again.
Transitioning from Virtual to Physical Guitar
While practicing on a computer keyboard is a useful starting point, transitioning to a physical acoustic guitar requires some adjustments. Understanding these differences can help you manage your expectations and make the transition smoother.
One of the primary differences is string tension. Computer keys require very little pressure to press. Physical guitar strings, especially steel strings, require significant finger pressure to press down against the fretboard. When you first start playing a physical guitar, your fingertips will likely feel sore. Over time, your fingers will build strength and develop hard calluses, which will make playing more comfortable.
Another difference is hand posture. On a computer keyboard, your hands are positioned flat. On a physical guitar, your fretting hand must arch over the fretboard. This allows your fingertips to press the strings perpendicularly, preventing them from muting adjacent strings. Your plucking hand must also hover over the soundhole, keeping your wrist relaxed and aligned.
Finally, you will need to adjust to the physical spacing of the instrument. A guitar neck is much wider and longer than a computer keyboard, and the distance between strings and frets is larger. You will need to build spatial awareness to find the correct frets and strings without constantly looking at your hands.
Despite these differences, the cognitive muscle memory you build online—such as memorizing chord shapes, understanding fretboard layouts, and developing finger-thumb independence—will help speed up your progress when you pick up a physical instrument. By separating the mental aspect of learning from the physical challenges, you can build a strong foundation that makes transitioning to the physical guitar easier.
Advanced Fingerpicking: Syncopation and Melodic Integration
Once you are comfortable with the basic fingerpicking patterns, you can explore syncopation and melodic integration. Syncopation involves playing off-beat notes, which creates a rhythmic, driving feel. Melodic integration involves weaving melody lines into your fingerpicking patterns, allowing you to play the lead vocal line and the accompaniment at the same time.
To practice syncopation, you can modify the Travis picking pattern. Instead of playing the treble notes directly on the beat, play them slightly before or after the bass notes. This creates a syncopated rhythm that is common in folk, blues, and ragtime music.
To practice melodic integration, start with a simple chord progression. Identify the melody notes that fall within those chords, and play them on the higher strings while maintaining a steady bassline with your thumb. This technique requires a high degree of finger independence, which you can develop by practicing slowly and consistently on the virtual guitar.
Structuring Your Daily Riyaz (Practice) Routine
Consistent practice (Riyaz) is essential for building muscle memory and improving your playing. Here is a suggested 20-minute daily practice routine using the virtual guitar:
- Warm-up (3 minutes): Play open strings sequentially to warm up your fingers and verify your keyboard layout. Run the Flight Mode Audit to ensure you are practicing in a private, local environment.
- Chord Transitions (5 minutes): Practice switching between common chord shapes, such as C Major, G Major, A Minor, and E Minor. Focus on placing your fingers on the keys simultaneously.
- Fingerpicking Drills (7 minutes): Practice the Simple Arpeggio, Travis picking, and Waltz patterns. Use a metronome to keep your timing steady.
- Song Practice (5 minutes): Apply your chord transitions and fingerpicking patterns to a song you are learning. Focus on playing smoothly and maintaining a consistent rhythm.
To help you stay focused, keep your practice space organized. Order a hot tea or snacks using services like Zepto or Swiggy Instamart before you begin, so you don't have to interrupt your session. Having a dedicated, comfortable space can help you get the most out of your practice time.
Technical Architecture of the MojoDocs Web Guitar
The MojoDocs Web Guitar is built using the browser's native Web Audio API and HTML5 Canvas. The application is designed to be lightweight, responsive, and private, running entirely on your local device without sending data to external servers.
The audio routing graph is constructed as follows:
- String Nodes: Each of the six virtual strings is represented by a Karplus-Strong synthesis node. These nodes generate the raw waveform of the plucked string.
- Convolver Node: The output of the string nodes is routed through a ConvolverNode. This node uses a local acoustic impulse response (IR) file to simulate the acoustic resonance of a guitar's wooden body.
- Biquad Filter Node: The signal then passes through a BiquadFilterNode configured as a low-pass filter. This allows users to adjust the brightness of the tone, simulating the difference between nylon and steel strings.
- Dynamics Compressor Node: Finally, the signal passes through a DynamicsCompressorNode. This node prevents digital clipping and distortion when multiple notes are played simultaneously, ensuring a clear, balanced sound.
- Audio Destination: The compressed signal is routed to the AudioContext's destination, which sends the sound to your headphones or speakers.
By handling all synthesis and routing in the browser, the application achieves sub-5ms latency, providing a responsive experience that is essential for real-time music practice. For more details on our audio tools, you can read our guide on the MojoDocs Web Guitar.
Comprehensive Chord Chart for Virtual Guitar Practice
This reference chart maps common acoustic guitar chords to their corresponding QWERTY keys on the MojoDocs Web Guitar. Use this chart to practice your chord shapes and transitions.
| Chord Name | Guitar Notes | QWERTY Key Map | Fingering Pattern |
|---|---|---|---|
| C Major | C - E - G - C - E | R + D + Z + I + H |
Thumb on R, Index on Z, Middle on I, Ring on H |
| A Minor | A - E - A - C - E | Q + D + C + I + H |
Thumb on Q, Index on C, Middle on I, Ring on H |
| G Major | G - B - D - G - B - G | 4 + E + A + Z + U + L |
Thumb on 4, Index on Z, Middle on U, Ring on L |
| E Minor | E - B - E - G - B - E | 1 + E + D + Z + U + H |
Thumb on 1, Index on Z, Middle on U, Ring on H |
| D Major | D - A - D - F# - A - D | A + C + P + K |
Thumb on A, Index on C, Middle on P, Ring on K |
Conclusion: Embracing Accessible Digital Music Practice
Learning the guitar does not have to be limited by immediate access to a physical instrument or the high cost of lessons. By using browser-based tools like the MojoDocs Web Guitar, students can build essential muscle memory, learn chord layouts, and master fingerpicking patterns in a private, offline environment. This local-first approach ensures that your data remains secure and your practice sessions are free from network latency.
Whether you are a beginner looking to build your confidence before buying a physical guitar, or an experienced player looking for a convenient way to practice chord progressions on the go, the virtual guitar offers a practical, secure solution. By combining real-time audio synthesis with a local-first design, MojoDocs makes music practice accessible, private, and free for everyone.
Ready to Start Learning?
Launch the MojoDocs Web Guitar and practice your fingerpicking patterns offline.
Open Web Guitar